Thursday, December 21, 2017


We camped at Fall Creek Falls State Park in Spencer, TN for 5 nights in early August, 2017 in our 1997 Georgie Boy Maverick Class C Motorhome.  We were there just after locals schools had started and the week was quiet and peaceful, things began to pick up by Friday.
Waiting for the nightly "Firefly" show... dreamy...


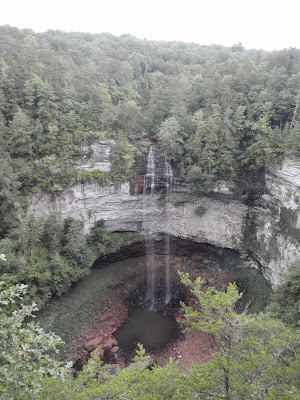
Overlook to view Cane Creek Falls - there is a difficult trail to get to the base
called the "Cable Trail", really fun, but a lot of work up and down!
This was our 3rd time visiting the park (over a 12 year period), and we can't wait to go back again!  5 nights really wasn't long enough, we agreed we could easily do 2 weeks at this park, exploring it and enjoying the surrounding area.


What a day...what a view...exploring outside the park
The park is really big, we brought our scooter and our bikes to get around.  It's really handy to have something to get from place to place, as things are pretty spread out.  In addition, you may want to explore places outside the park.

In a nutshell: Waterfalls, fireflies, hiking, incredible views!, bike riding, sweet forest scents, family fun, adventure, swimming holes, peaceful beauty all around, birds, flowers.

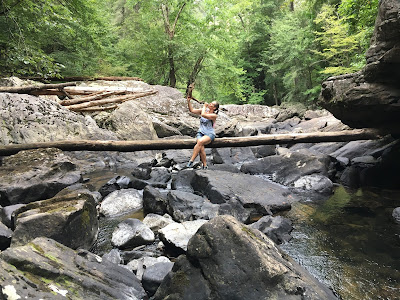
Great swimming hole!

Fall Creek Falls

Lovely roads!

Amazing views!

Adventuring!


Things to be aware of:  
Daunting edges!  Know your own abilities,
 and please be careful!

This park is very natural and beautiful, this is actually one of the things we love about it, there aren't a lot of "safety" railings, etc... however, if you aren't careful it can be dangerous.  There are high rocky edges that will most likely be fatal should you fall.  Be sure to know your limits, check carefully before stepping close to edges, and don't allow your children to "run ahead" of you when you approach overlooks.  It's easy to walk off the trail and many overlook spots end at a sheer drop off. Be cautious, be wise and enjoy the raw beauty.

Sometimes water that isn't rushing makes for great photos.

We are several feet from this edge, but it can easily be accessed
and is a sheer drop to the rocky bottom.  Please be cautious!

That is one of the overlooks along the loop trail...amazing views!
We did see a copperhead, however we were creek walking along the edge in a very rocky area.  Don't be too concerned about their "look alike" the watersnake, but inform yourself of what each looks like and check before you step.  NOTE: Copperheads are "shy" for vipers, so at least that's a good thing. ;)


Negatives:  There was quite a bit of garbage in areas that I truly thought should have been clean.  :(  It made me sad, someone said the "locals" don't clean up after themselves, but I kinda thought the park staff should be doing that as well. :/

Wear a good spray!  I came home with plenty of chigger bites!  Ouch (still itching)...though I did put on spray..sigh.

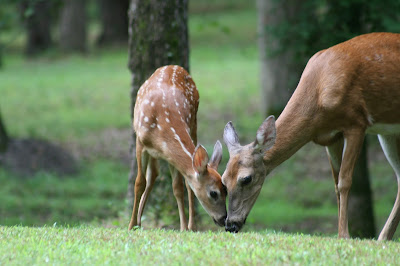
We saw so many deer each day, both in the campground and throughout the park.  Please watch for them and obey the speed limit within the park! 


Fall Creek Falls is controlled by a Dam, and the water was not gushing when we visited this year.  However, the first time we visited was in June (many years ago) and all the Falls were really flowing hard.  I heard that spring is the best time for a full flow, however, it would be very cold for swimming!  Choices choices... :)

Do a search to find other Falls and State Parks within an hour from this one (there are a few),  also look into "swimming holes of Tennessee" if you like the more secretive "local" thing.  Take a day or two to explore them.

If you like authentic Mexican food, go to El Tapatio Sparta! Yes, really, in Tennessee!!!  I grew up on the border and I know real Mexican food when I taste it.  Check out it out and maybe grab a movie at the Drive In afterward! :)


Go for a country drive outside the park to see some beautiful countryside, or just stay within the 20,000 acres of beautiful Fall Creek Falls and have a blast!  I heard they have the BEST ice cream ever!  So you should probably give it a try. 


We love this park and always look forward to going back again! :)


Tuesday, March 28, 2017

Kissimmee Prairie Preserve State Park - Okeechobee, Florida

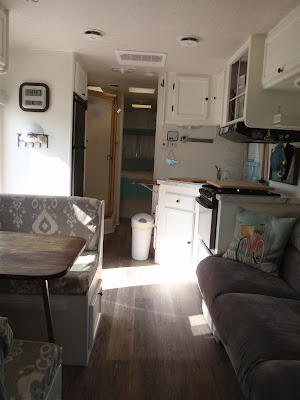
Our newly renovated 1997 Georgie Boy Maverick
We camped at Kissimmee Prairie Preserve State Park in Okeechobee, Florida for 2 nights.  We were there in mid March, 2017 in our 1997 Georgie Boy Maverick Class C.


(To view a short youtube slideshow of our visit, scroll to the bottom of this post)

I love wild raw Florida... and each time we venture out I am awed by all the different beauty that this state has to offer.  

IN A NUTSHELL:


Sunrise on the Prairie
Great hiking, biking, shady hammocks, thick forests, open prairies, birds of all types and sizes, alligators!  Sharks!  Cold clear springs on a hot summer day and crystal blue waters full of colorful sea-life down in the Florida Keys.  I never cease to be amazed by the beauty that God has created.


Burrowing Owl on Trail
Kissimme Prairie Preserve is an adventure...their motto is "don't look AT the prairie, look INTO it" and it's true, you must look deeply into it, and you really can't do that sitting in a chair at your campsite.  Bring good hiking shoes, or a bicycle (if you can handle DEEP sand and difficult terrain), a camera and take your time, look for the little things, like Purple Iris's blooming in the middle of a dry and weary grass prairie, burrowing owls along a dusty road, and gators sunning themselves along the path.


Look INTO the prairie for the real treasures

Racoon hiding in palm tree


Tiny butterfly on tiny daisy like flower

Along with all of this, don't forget to look UP... up at the amazing dark sky simply filled, FILLED with stars.... breathtaking and amazing...this is the place for stargazers!

CAMPERS:

Since this park is only 2 1/2 hours from home, I booked us a quick trip... 2 nights during the week.  Hoping for peace and quiet, and it would have been, but for the group of families that were camping right next to and around us, who unfortunately did not have camping etiquette.  The kids were literally screaming most of the time... and the parents were quite loud and obnoxious themselves, I even overheard "it doesn't matter, no one knows us here"... :/

CAMPSITES:

There aren't a lot of campsites in this park.  There are two sides, the "family side" and the "equestrian side" (This would be a wonderful place to bring a horse!!!).  However, people were camping on the Equestrian side without horses, and it was VERY peaceful over there! Great idea for next time ;)  


Sunrise from under our awning
We camped in the family side on site 18 which was a nicely sized pull through site that faced the prairie (and the beautiful sunrise).  The campground road was between us and the prairie, but not much traffic came through.  


Deer on trail
The best site for this side (in my opinion) would be #20.  It faces the prairie with woods to one side, no road in your view.  Without all the screaming kids, I would imagine deer might be around to greet you in the morning. 


We love spending time together :)

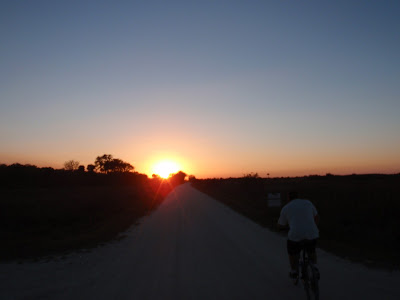
Riding off into the sunset


Photog


Wild Turkey

Sunset near Equestrian Sites
If you camp on the equestrian side, you are near some trail heads and near the best place to see the sunset each night... spectacular!  However, you are set deeply in the shade and I would be concerned about mosquitoes during the summer. We had very little issue with mosquitoes at this time.

TRAILS AND WILDLIFE:


That's a gators tail sticking out of the bushes... we did not pass that way. ;)
Speaking of trails there are MANY to choose from, however, I would definitely go over the trail map with someone at the camp office.  We mapped out a bike ride for the afternoon, and were halfway through when we encountered a wildlife ranger, he informed us that the way we planned to go was not maintained, and was very thick mud.  We were so thankful for that, as it was nearing sunset and we would have been stuck quite far out in "gatorland" ;)  


This was a nice easy portion of the trail
We are in pretty "decent" shape, but my legs were screaming each day as we pedaled through some seriously thick sand on the trails.  Some areas were ok, but some were pretty deep. We like biking trails, but walking would be great as well... bring water, there are miles to cover! Bring your camera! 
This was a very sandy portion of the trail
There is much to see... 


These guys were right off the road, just hanging out...
Gators...wow... it was intimidating, exciting and scary all at the same time to see so many of them in one place out in the wild.  However, this is natural Florida and that's where they live.  Respect them, keep your distance, view them, they are an interesting awesome creatures.... don't go TOWARD them and don't feed them please.  ;)


Eastern Meadowlark
We saw lots of birds, so keep your ears and eyes open for colors and unfamiliar calls, we saw deer and they were nearby and not intimidated by us, look into the prairie and see all the layers of flora.... so much beauty out there. :)


Would we go back?  Yes!  There were many trails we didn't have time to cover, and I would plan to go there during a meteor shower or super dark moonless night.  Laying out to watch the stars was amazing each night!

What time of year would we recommend?  
Not the summer...no way!  There is so much ground to cover, I would go here during the cooler months.  Also keep in mind the rainfall.  It was very dry when we visited (under a burn ban), but when it rains, you may end up trudging through mud or even deep water on a trail...not my cup o' tea with gators around. ;)

If you liked this post, please take a moment to leave a comment.  Let us know if you have any questions or if there is something we should address in future reviews. :)  


Saturday, March 25, 2017

RV Makeover - Part II - Final "Reveal"


We finally finished!  

We made-over our 1997 Georgie Boy Maverick Class C.

It's been over a year in the making, as we decided to work in II phases and only in our "winter months" (Jan/Feb if we are lucky) ;)


In "Phase I", January of 2016, we made some minor and major changes:

*Painted the bedroom walls and cabinets
*Moved coach TV
*Added "power side mirrors"
*Added a couple of storage areas
*Re-covered/replaced curtains and valances
*Made slip covers for the dinette
*Re-covered the couch in grey Chenille
*New Privacy curtain
*Added flip counter to kitchen

For "Steps for prep and painting of walls and cabinets", click HERE.

Phase II was a LOT more work and much more time consuming.  Things we did in Phase II... the final phase:

*Removed kitchen and bath cabinet bases, dinette, bed base...basically anything that was touching the floor that could be removed.
*Tore out flooring and carpet throughout coach (Carpet in an RV???? why?)
*Cut out and replaced a major portion of the sub-floor that had previous water damage and rot.
*Installed new flooring (love it!)
*Painted (or stained) EVERYTHING! (Cabinets, walls, knobs and hinges, fridge, ugly plastic gold trim!)
*Rebuilt faces of dinette due to previous water damage
*Replaced bath and kitchen counter tops
*Built new dinette table

...and now we are sharing it with you. :)  

I wanted it bright and white, fresh, happy, light and fun.  After years and years of RV ownership, we were tired of the fake wood cabinets, the "gold" trim, the laminate tables, crud harboring carpet, etc... So we purchased Georgie with full knowledge that she was sound, and in good shape overall, but with some flaws and needs that we were willing to take on as we remodeled...

Before and After - Looking toward cab...
*removed overhead curtain and track
*recovered couch
*removed center console TV, using space behind for storage
*removed carpet
*made dinette slipcovers
*removed side valances
*recovered top valances
*added curtains
*added pocket storage at door and cookbook/magazine rack
*Painted everything cabinets, walls and hardware

Before and After - Looking toward rear
*Removed Vinyl flooring
*New kitchen countertop
*Painted stove hood vent
*replaced control panel
*Added magnetic knife rack
*Added counter extension (and stained it dark)
*Painted Fridge door panels
*Note:  Painted glass insert cabinets!
*Removed carpet from base of shower...why was it there???


Before and After - Flooring
I researched and read and listened and thought and planned... and finally decided on 100% waterproof vinyl click lock floating plank flooring.  I love it.  It does not stick down, it clicks togehter on all sides and has a real wood texture and feel, but is flexible.  Love.  :)
Yes, we broke the rules, and we did nail, drill and screw through it.  

A couple of "Before and After" Overall pics...
*This RV had water damage, we knew that going into the purchase.  All leaks had been repaired, but the patch job was not the best.  There was a soft spot in the kitchen area and a board needed to be replaced. 


Before and After - Bathroom
*Things I will never understand... carpet around a toilet???  Ewww... just no.
*Everything was painted
*New curtains made (the blinds were actually original and worked fine)
*New countertop
*Flooring around the toilet base was glued down with liquid nails 

Before and After - Overhead Cab
*Removed the TV (we put one on a swing down wall bracket that tucks away up into the cab)
*Added hinges to that wall piece and made it a door so we can store blankets in the center
*New curtains
*Painted woodwork and hardware

Before and After - View from back bedroom when bathroom shut off door is opened.
Yes... the shower is still gold.... sigh... We can't have everything can we?  ;)

New Dinette Table
The table was structurally sound, but I really wanted some deep wood pieces to sort of anchor all the white.  I never understood why a table needed to be made out of countertop material when it isn't at home.... so we got a nice piece of stainable Pine and just cut it to size.  We did not put the bottom lip on it, so IF we ever need to use the dinette as a bed we will need to cross that bridge.  However, we don't have plans for that in the immediate future. ;)
I used a dark pecan stain and wax finish.


Dinette Faces Rebuilt
The dinette faces had some pretty bad water damage (as you can see below).  The pressed wood was swollen and fluffy along the edges.  we used a thin nice face plywood and my hunky man recut them.

Spray Painting!
The knobs were horrid... plastic gold that had aged and they were just ugly.  The hinges were metal, and were not shiny gold, but we wanted everything to match nicely, including the stove vent hood which was cream and is now a nice glossy black.
The trim for the ceiling vents and the A/C vents were yellowish (probably from age).  Everything was primed and painted with spraypaint, and it all looks so good! :)  My Man is the spray paint king! ;)


Miscellaneous "Stuff"...
*Mikey zipping in that new piece of flooring...that was a bear of a job!
*removing carpet covered wood that was screwed INTO the shower base... ???? But why????
*the old vinyl "wood look" rolled flooring... the grain wasn't even in the right direction... :/
*The counter behind the stove had water damage and had some cuts in it that shouldn't have been there.

The Moldy Hole!
There was a soft spot right in front of the kitchen sink... we knew the camper had been damaged by a water issue, we suspected it came through the stove vent at one time, as the oven was brand new and the location of most of the damage led us to that conclusion.  The floor had been patched, but the patch was not big enough and there was another area of damage... to have the least seams possible, Honey decided to cut a large area out and replace with a whole piece of Plywood.  HARD job, but he's the man to do it.. he's Superman. :)

Flooring
*Since the flooring was vinyl and flexible, we were careful to pull out every single staple, or nail.  Fill in any dips or holes and sand the entire floor to get a good surface.  In addition, as we worked, it was important to vacuum an area right before we laid down flooring to make sure not little bits got in there. 
*The flooring is "floating", however on the base of the toilet and the stairs, we glued it down.
*Cutting the flooring to fit the slanted and odd walls of the entrance to the bathroom was my biggest nightmare, lol.  It took me FOREVER!   But, alas... it is done and I'm very proud of it and quite happy. ;)
*In the bedroom there are wires and water pipes running along the edge of the wall.  Mavericks solution was a piece of paneling covered in carpet that laid slanted so that you basically tripped all over it as you tried to walk along the edge of the wall.  We built small boxes and glued flooring to them and set them in place.  Now at least if you loose your footing you can step onto the box, not twist you ankle on a slanted piece of flexible paneling...?????  Again, who comes up with this stuff?

Painting!
The link for the exact steps we took is at the top of this post... it is time consuming to say the least.. and we tried like crazy to make sure we had every single piece of wood accounted for, every door, every drawer... but, of course, when it was all said and done I couldn't find the two little kitchen drawers... because I had stuffed them in the bedroom closet.  Don't ask...I don't have an answer, lol.  So, they had to be done after all was cleaned up... but it's done, and we are happy. ;)


Putting it all back together again...
This was such a crazy project, sleepless nights, paint in my hair, splinters, SO many trips to the home improvement stores to get the things we forgot the last time we were there, sigh.  The painting, the sanding, the dust, the cutting, the nailing and screwing and gluing...but we survived.  :)  And we are really happy with the outcome.  Would I do it again?  Hmmm.... ask me another year... ;)

And here she is in all her glory...Georgie (or Georgianna if you want to be fancy) ;)  

She's bright and happy and easy to sweep out.  Her paint wipes clean, her counters are pretty, she's comfy and fluffy and ready to roll!  She takes us to places we so want to go! :)


 So, whadya think?  

If you made it this far, please leave a comment and let us know, or ask any questions!