
We finally finished!
We made-over our 1997 Georgie Boy Maverick Class C.
In "Phase I", January of 2016, we made some minor and major changes:
*Painted the bedroom walls and cabinets
*Moved coach TV
*Added "power side mirrors"
*Added a couple of storage areas
*Re-covered/replaced curtains and valances
*Made slip covers for the dinette
*Re-covered the couch in grey Chenille
*New Privacy curtain
*Added flip counter to kitchen
For "Steps for prep and painting of walls and cabinets", click HERE.
Phase II was a LOT more work and much more time consuming. Things we did in Phase II... the final phase:
*Removed kitchen and bath cabinet bases, dinette, bed base...basically anything that was touching the floor that could be removed.
*Tore out flooring and carpet throughout coach (Carpet in an RV???? why?)
*Cut out and replaced a major portion of the sub-floor that had previous water damage and rot.
*Installed new flooring (love it!)
*Painted (or stained) EVERYTHING! (Cabinets, walls, knobs and hinges, fridge, ugly plastic gold trim!)
*Rebuilt faces of dinette due to previous water damage
*Replaced bath and kitchen counter tops
*Built new dinette table
...and now we are sharing it with you. :)
I wanted it bright and white, fresh, happy, light and fun. After years and years of RV ownership, we were tired of the fake wood cabinets, the "gold" trim, the laminate tables, crud harboring carpet, etc... So we purchased Georgie with full knowledge that she was sound, and in good shape overall, but with some flaws and needs that we were willing to take on as we remodeled...
Before and After - Looking toward cab...
*removed overhead curtain and track
*recovered couch
*removed center console TV, using space behind for storage
*removed carpet
*made dinette slipcovers
*removed side valances
*recovered top valances
*added curtains
*added pocket storage at door and cookbook/magazine rack
*Painted everything cabinets, walls and hardware

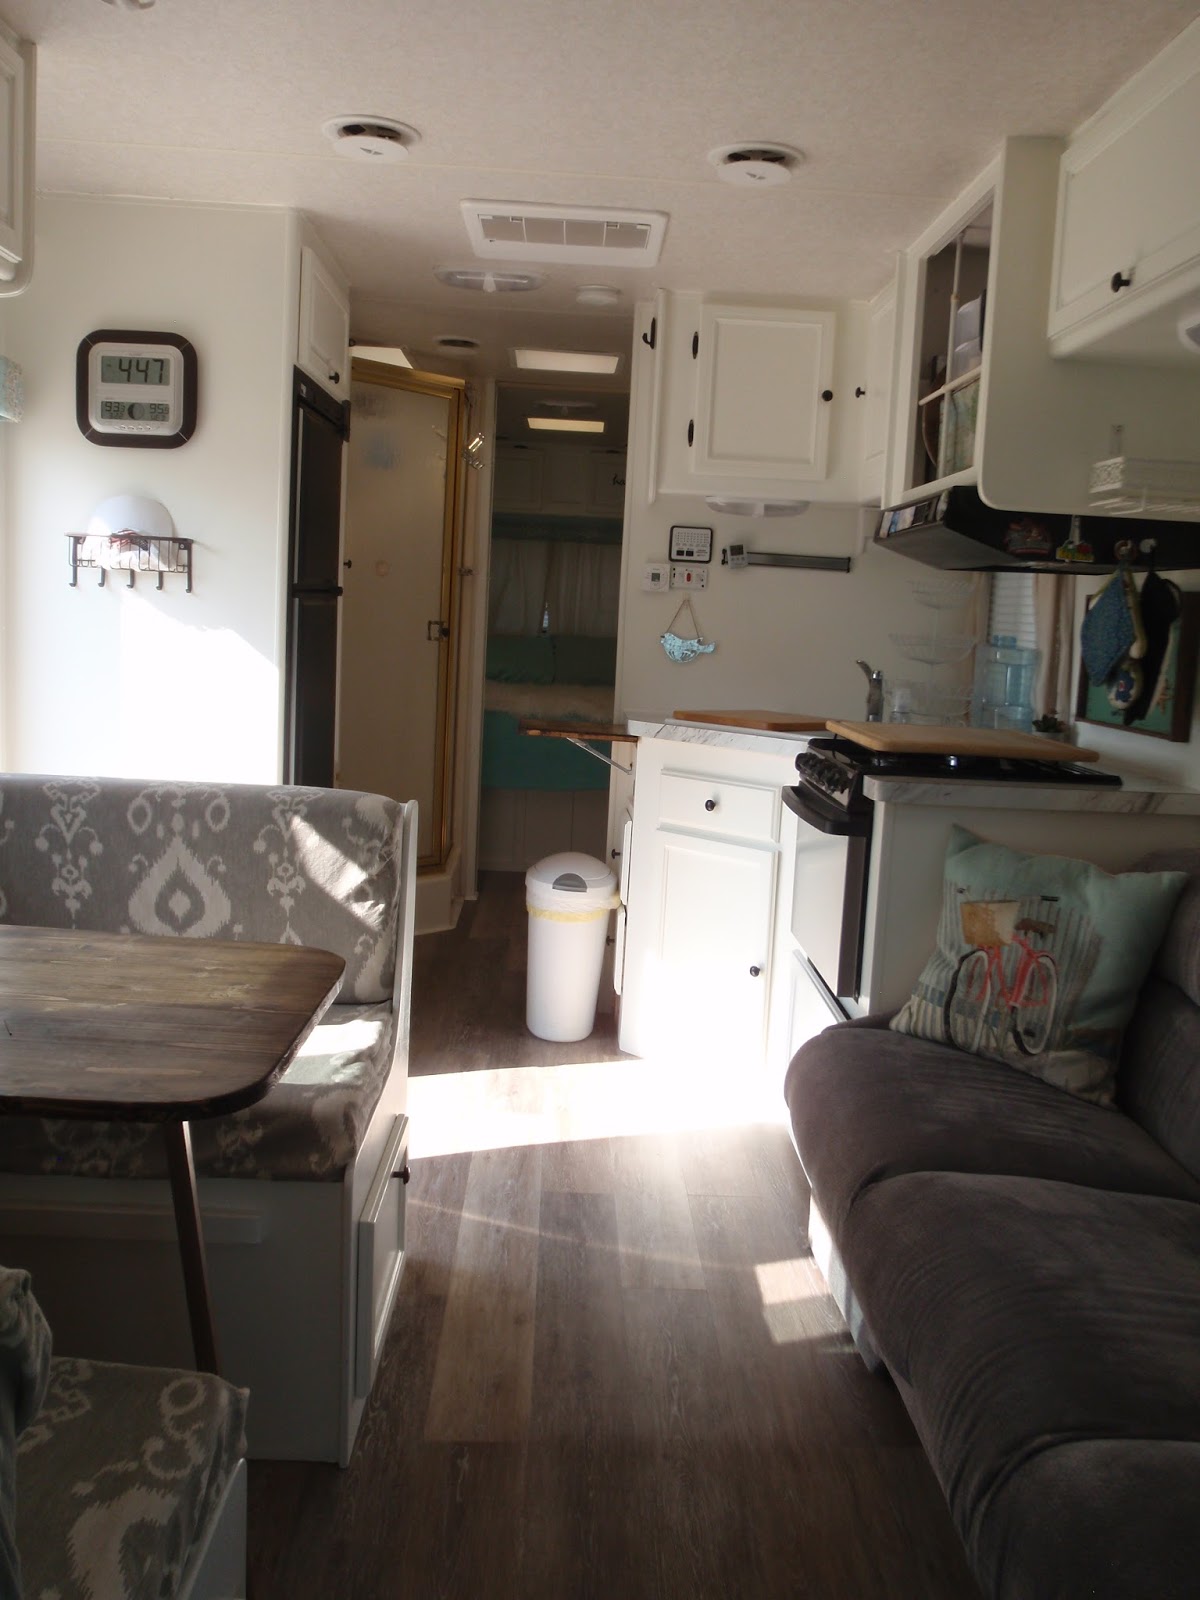
Before and After - Looking toward rear
*Removed Vinyl flooring
*New kitchen countertop
*Painted stove hood vent
*replaced control panel
*Added magnetic knife rack
*Added counter extension (and stained it dark)
*Painted Fridge door panels
*Note: Painted glass insert cabinets!
*Removed carpet from base of shower...why was it there???

Before and After - Flooring
I researched and read and listened and thought and planned... and finally decided on 100% waterproof vinyl click lock floating plank flooring. I love it. It does not stick down, it clicks togehter on all sides and has a real wood texture and feel, but is flexible. Love. :)
Yes, we broke the rules, and we did nail, drill and screw through it.

A couple of "Before and After" Overall pics...
*This RV had water damage, we knew that going into the purchase. All leaks had been repaired, but the patch job was not the best. There was a soft spot in the kitchen area and a board needed to be replaced.


Before and After - Bathroom
*Things I will never understand... carpet around a toilet??? Ewww... just no.
*Everything was painted
*New curtains made (the blinds were actually original and worked fine)
*New countertop
*Flooring around the toilet base was glued down with liquid nails

Before and After - Overhead Cab
*Removed the TV (we put one on a swing down wall bracket that tucks away up into the cab)
*Added hinges to that wall piece and made it a door so we can store blankets in the center
*New curtains
*Painted woodwork and hardware

Before and After - View from back bedroom when bathroom shut off door is opened.
Yes... the shower is still gold.... sigh... We can't have everything can we? ;)

New Dinette Table
The table was structurally sound, but I really wanted some deep wood pieces to sort of anchor all the white. I never understood why a table needed to be made out of countertop material when it isn't at home.... so we got a nice piece of stainable Pine and just cut it to size. We did not put the bottom lip on it, so IF we ever need to use the dinette as a bed we will need to cross that bridge. However, we don't have plans for that in the immediate future. ;)I used a dark pecan stain and wax finish.

Dinette Faces Rebuilt
The dinette faces had some pretty bad water damage (as you can see below). The pressed wood was swollen and fluffy along the edges. we used a thin nice face plywood and my hunky man recut them.

Spray Painting!
The knobs were horrid... plastic gold that had aged and they were just ugly. The hinges were metal, and were not shiny gold, but we wanted everything to match nicely, including the stove vent hood which was cream and is now a nice glossy black.The trim for the ceiling vents and the A/C vents were yellowish (probably from age). Everything was primed and painted with spraypaint, and it all looks so good! :) My Man is the spray paint king! ;)

Miscellaneous "Stuff"...
*Mikey zipping in that new piece of flooring...that was a bear of a job!*removing carpet covered wood that was screwed INTO the shower base... ???? But why????
*the old vinyl "wood look" rolled flooring... the grain wasn't even in the right direction... :/
*The counter behind the stove had water damage and had some cuts in it that shouldn't have been there.

The Moldy Hole!
There was a soft spot right in front of the kitchen sink... we knew the camper had been damaged by a water issue, we suspected it came through the stove vent at one time, as the oven was brand new and the location of most of the damage led us to that conclusion. The floor had been patched, but the patch was not big enough and there was another area of damage... to have the least seams possible, Honey decided to cut a large area out and replace with a whole piece of Plywood. HARD job, but he's the man to do it.. he's Superman. :)
Flooring
*Since the flooring was vinyl and flexible, we were careful to pull out every single staple, or nail. Fill in any dips or holes and sand the entire floor to get a good surface. In addition, as we worked, it was important to vacuum an area right before we laid down flooring to make sure not little bits got in there. *The flooring is "floating", however on the base of the toilet and the stairs, we glued it down.
*Cutting the flooring to fit the slanted and odd walls of the entrance to the bathroom was my biggest nightmare, lol. It took me FOREVER! But, alas... it is done and I'm very proud of it and quite happy. ;)
*In the bedroom there are wires and water pipes running along the edge of the wall. Mavericks solution was a piece of paneling covered in carpet that laid slanted so that you basically tripped all over it as you tried to walk along the edge of the wall. We built small boxes and glued flooring to them and set them in place. Now at least if you loose your footing you can step onto the box, not twist you ankle on a slanted piece of flexible paneling...????? Again, who comes up with this stuff?

Painting!
The link for the exact steps we took is at the top of this post... it is time consuming to say the least.. and we tried like crazy to make sure we had every single piece of wood accounted for, every door, every drawer... but, of course, when it was all said and done I couldn't find the two little kitchen drawers... because I had stuffed them in the bedroom closet. Don't ask...I don't have an answer, lol. So, they had to be done after all was cleaned up... but it's done, and we are happy. ;)

Putting it all back together again...
This was such a crazy project, sleepless nights, paint in my hair, splinters, SO many trips to the home improvement stores to get the things we forgot the last time we were there, sigh. The painting, the sanding, the dust, the cutting, the nailing and screwing and gluing...but we survived. :) And we are really happy with the outcome. Would I do it again? Hmmm.... ask me another year... ;)

And here she is in all her glory...Georgie (or Georgianna if you want to be fancy) ;)
She's bright and happy and easy to sweep out. Her paint wipes clean, her counters are pretty, she's comfy and fluffy and ready to roll! She takes us to places we so want to go! :)


So, whadya think?
If you made it this far, please leave a comment and let us know, or ask any questions!
Wow!! Sure looks better than the last time I saw it. You and your hunky man make me tired just looking at the pictures. So now are you going to add indoor greenery? Lokk it. Maybe I will come to spend the night! ha ha
ReplyDelete:) Thanks Shirley. Makes me tired all over again looking at the pics. ;) No greenery. I have a tiny fake plant in the kitchen, and usually when we go camping I bring some fresh cut flowers. :)
DeleteAwesome job .... love the new look .. I've got a 2000 Georgie Boy Class A you can tackle 😁 .. jk..
ReplyDeleteThanks Joe! No tackling for us, we are taking a LONG break from that, lol. Funny, we've owned many campers and until we purchased this one had never even heard of Georgie Boy, now we are hearing about them more and more. :)
DeleteAwesome job!
ReplyDeleteThanks Carla! :)
DeleteWow! I love what you did! Gives me ideas of things I can do to my 'new' 2001 'Dutchgal'
ReplyDeleteThanks! Yeah, we always buy "new" (to us) older ones too. ;) If you make any changes I hope to see!
DeleteWowowowow! It's bee-u-tee-ful, Kathy and Mike! What a wonderful job you did! And you're still happily married ;-)
ReplyDeleteLOL, thanks so much Freedom Fighter! :) We've tackled quite a few major projects together in our married years, we like to think we work well together. Of course there are those days when one or the other gets frustrated and we are lacking in sleep, but then it all comes together in the end. :)
DeleteLooks fantastic!
ReplyDeleteThanks 8amps!
DeleteLove it! I have book marked your page for a reference as I tackle my 1996 Georgie Boy Swinger.
ReplyDeleteWonderful! Would love to see pics of yours!
DeleteI had a set back. The fridge died, so I have a new one on the way. In the meantime I removed the jack knife sofa, the captains chair and ordered the flooring. The main glitch has been the hardwood floor that was glued down in the galley. After much deliberation, I will be leaving the hard wood and laying the vinyl flooring around it. Not what I was wanting, but it will be way better than the 21 year old rug that is currently in there. I will post pics. Today I will begin removing the rug. BTW, Georgie Boy's name is "Buppy". I have hope Buppy turns out as beautiful as your Goergie!
Delete